A Beginner's Guide to Success with Casetify
Casetify is a website where you can design your own phone cases, Apple Watch bands, laptop cases and iPad cases. You can either upload your own photos into various templates or you can purchase any of their curated designs.
Setting up Shop
As an artist, Casetify can be a nice source of passive income. I've had my Casetify shop for about a year and I've been doing pretty well. All you need to do to open a shop is contact Casetify using a form on this page. You should have some work to show them (since you have to be approved to open a shop). If you don't have a website, you can set up a portfolio on a website like Behance for free. If they like your work they will send you an email with instructions on how to set up your shop by uploading a few designs and later setting up your Paypal info for getting paid.
Get Familiar With What Casetify Sells
Casetify is mostly known for their phone cases but they do offer a few other products which include laptop sleeves, iPad cases and Apple Watch bands. They make it a point to let you know their most popular, best-selling products are their iPhone cases, particularly the ones that feature their ability to print on translucent cases.
In addition to Apple products, they do sell cases for Android phones. These do sell as I've sold a couple myself.
A Few Tips Before You Start Designing
1. Know How to Create Images to Fit the Different Product Designs
Each product has it's own recommended dimensions. Here is a list I received from Casetify after I opened my shop:
Phone case minimum res: 1100px x 2000px
Macbook Sleeve minimum res: 4800px x 2500px
iPad minimum res: 2400px x 3000px
Apple Watch Band minimum res: 335px x 2660px
Casetify also made it a point to note that their best-selling cases are the ones that take advantage of their translucent cases. To take advantage of this feature you will need to incorporate transparent areas in your design and export as a PNG (PNG-24 with transparency checked in Photoshop). It's important to note that in addition to the translucent phone cases, the iPad snap cases also incorporate the transparency feature.
My personal favorite case is their new Standard Cases. These are great because you can change out the design really easily. Essentially the case is two parts, a bumper frame and a backplate. The bumper frames come in over 5 colors and with the amount of different backplate designs there are endless variations.
2. Promote Promote Promote!
After setting up your shop with a few designs, you should plan on promoting your shop and designs on your different social media channels. To easily create these promos, I created a template in Photoshop. In this template I include a call-to-action (like "check out my shop" or "buy now"), my shop URL and an area where I can place the phones and sometimes a background. I like to keep certain elements the same (like the fonts of the text) and switch up the backgrounds or placement of the phones for variety).
I personally use Twitter and Facebook to promote my shops since post traffic on those two sites are higher and it won't look as spammy when promoting there. I do post to Instagram occassionally but I try not to too often because I don't post as often there and I don't want my feed full of salesly images. It's important to think about the best platform for your promotions. If you post a lot to Instagram and have tons of followers there, it may be worth posting once or twice a day there.
Check out Casetify's resources site for lots of great info on selling and promoting on Casetify.
3. Submit to Collection Calls
*updated January 2017- I'm sorry, I was notified by Casetify that they do not do open calls for collections but they still encourage artists to submit many designs because you may get featured on one of their ads or social media streams!
4. Take Advantage of Sales
Everyone loves sales and are more likely to buy something when they can get a discount. Casetify almost always has a promo running! I quickly do a check of their site daily to see if there is a promotion going on (usually the details are at the top of the page). I will then start promoting the sale or coupon code on my social media. It's important to check daily because the promos can change and you don't want to promote a coupon code that is not active.
Note that the hottest time of the year for sales will always be around Christmas! Make sure you plan ahead, prep holiday themed designs, create lots of promo images to easily share via social media, and check for the current promo deals on Casetify's site. Promos run from Black Friday through Christmas (and sometimes even after) so it's good to check often and update your promo blasts as necessary.
5. Create New Designs Consistently
Casetify always promotes designs on their Instagram feed. I recommend following them to see what they like to promote. Also, if you're lucky enough to have one of your designs featured, you should repost it on your Instagram. I believe the best way to get noticed is by consistently creating new designs. I found that when I first opened shop and was creating new designs on a weekly basis I got featured more often on their feed. Now that I haven't been uploading as many designs (down to maybe every other month) I haven't been featured. I'm sure there is a correlation there.
Designing Your First Case
Ok you've set up shop, created designs in Casetify's recommended dimensions and are ready to start uploading. Here is a quick step by step process to adding a design to your shop.
1. Choose Which Product You'd Like to Create
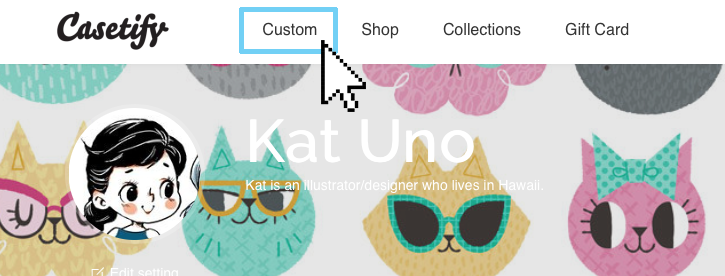
First, click on the "custom" button in Casetify's menu bar at the top left. The next page will give you options at the top of different devices you can choose from. You'll probably notice that the bulk of the page is dedicated to different iPhone cases. This is by design. Casetify will let you know upfront that iPhone cases (especially the clear cases) are their biggest sellers.
When I first opened shop I spent A LOT of time uploading designs to different products. I'd create one design and then I'd make a version for phone cases, iPad cases, and laptop sleeves (sometimes even watch bands). I'm only speaking from my experience but even though I heavily promoted all my products, I only have ever had phone case sales. There may be a few that do buy the other types of cases but I think that most people shop on Casetify for phone cases.
What can you take away from this? Well, if you don't want to spend extra time you can pretty much focus on just creating phone case designs. Nowadays that's what I do. I save a lot more time and I can focus my promoting on those products.
2. Choose The Device and Case Type
This next page is where you can choose the phone (or device) make and model. I usually start with the iPhone 6 or 6S. The default selection is the iPhone 6S new Standard case. If you click on the "device" icon you can choose from their other selections like iPad, Apple Watch, Macbook, or Android phones.
After choosing your device you can then choose case type. I usually like to choose either the New Standard or New Standard Pastel. They both feature the translucent cases but also have the added feature of the colored bumper frame.
Take a few moments to choose a frame (if applicable) and even the color of the iPhone to best match your design. Note that the choices you make in this step will be how your design will be displayed in your shop.
If you choose an iPhone, the options for your design will only be available on iPhone versions from 4/4S to 6/6s (and Plus versions) along with iPod Touch. I'm not sure why, but it doesn't seem like you can choose from Android devices. You may have to upload a different version of the design for Androids in your shop.
3. Choose the Design Layout
After you decide on what case you want your design displayed on, you should choose your layout. This is how your design will be displayed on the case. I always go with the full image layout (the second in the top row). You can try out other layouts but please note, you cannot have a design bleed over a number of the boxes/areas. Each box/or circle, will contain a separate image. These options are more for people who want to create cases with their own images from Instagram or other social media.
4. Upload Your Designs
So when you have your device, case and layout chosen, move on to uploading your designs. It's possible to link your Instagram and Facebook accounts to access photos there, but I only choose to upload designs directly. You can drag and drop multiple images at one time. After your design is uploaded you can easily drag and drop it onto the case. From there click "save design", name your new design and choose 3 categories. I've found the categories to be pretty lacking. There are only 9 to choose from and I often find my designs only fit into 2 (although you MUST choose 3). After this step Casetify offers a few social media channels where you can share your new design.
5. Promote Your Work!
It's time to promote your work! Remember the tips from above: 1) Create an image that has a "call-to-action" (a command like "buy now", "check out this design" or "shop my collection), 2) Post to any social media channels that work for you, 3) check Casetify's site for any current promotion, and 4) schedule a few posts using different images and text.
It's Time To Create!
Good luck with your shop! Don't forget to order yourself a case! It is really fun getting to tell people who ask about your case that you created it!
RELATED POST:
Freelance Life - Passive Income: What it is and Why You Should Take Advantage of it as a Creative Entrepreneur - This is my initial introduction to passive income and what forms I utilize to make extra income on the side.


